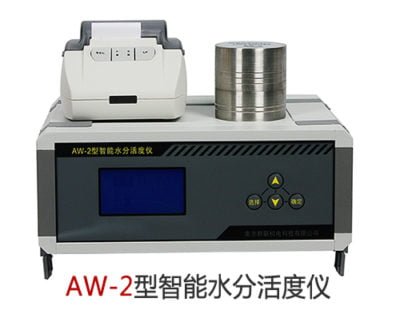
Installation
- The plug of QLAW Water Activity sensor into the sensor receptacle of the back panel of the instrument. The plug of the sensor is push-pull type, and shall be pushed by aiming at the receptacle
- The signal control line of the printer shall be separately connected to the signal control receptacle of the printer at the back panel of the
- Connect the power line of the instrument, and please confirm that the power switch of the instrument is in “off” state before the power is connected. Note: good grounding shall be provided for the power.
Use
- Functions of keyboard
Selection key: mainly used to select the item needing implementation;
Enter key: mainly used to implement the selected item;
Increase/decrease key: mainly used to adjust time and measurement time
- Operation
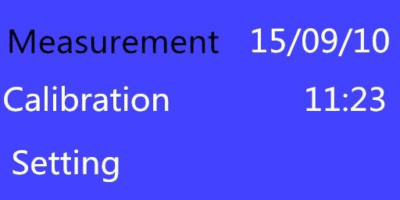
Before the power is connected, the instrument must be placed at the use environment for above 30 min. Turn on the power switch and the power switch of the printer, and the instrument display will show three optional functions (“measurement”, “correction” and “setting”) and current time in the homepage. The user can select functions with the “selection” key according to needs (the selected item will be shown in highlighted black).
After starting up home page, default “measure”, as picture 1
- Measurement
Measurement: First, put the object needing measurement into glassware (the object needing measurement shall be cut up as possible, and it shall account for 50%~80% of the volume of the glassware. During measurement, the glassware must not be covered with cover glass.), then put the glassware into water activity sensor and make the sensor covered. Select the measurement function and press “Enter” key, then the water activity detector will be in measuring status. The measurement time shall be 10 ~ 30 min (settable). During measurement, the options of water activity, temperature, measurement time and printing will be indicated. The printing option includes printing (printing after the measurement is completed or press “Enter” key to print the real-time data during measurement”), no printing and stops measurement, and this option can be selected with the “selection” key. After the measurement is completed, the instrument will indicate and print the final measuring results. At this time, the “Enter” key can be pressed to return to the homepage, so as to prepare for the next measurement.
Due to the tightness of the water activity sensor, the upper cover and base of the water activity sensor shall be placed staggered after use.
“Selection” Key select the item needing implementation Measurement, as the picture
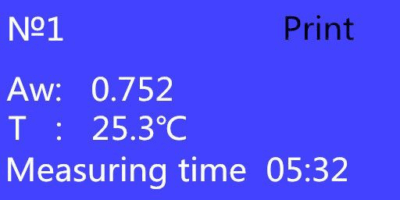
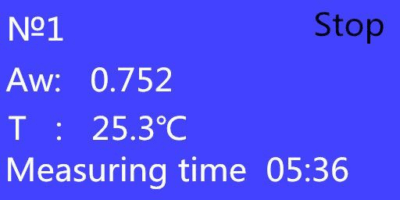
2 “Enter”, Star to measure, as picture2
(picture 2)
At the end of the default measurement, print out the measurement results.
If you need to print out the real-time data in the process of measurement, press the “Enter” button.
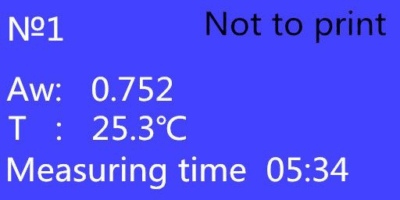
If you don’t need to print out the measurement results, press the “Selection” button.
As picture 3
If you need to stop measuring, please press the “Selection” button twice, as picture 4. And after that press “Enter” button to go back to the home page. As picture 1
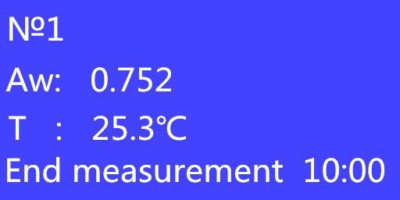
Measuring will display as picture 5, press “Enter” button to go back to the home page, as picture 1
The measured time, please set it in the “set” of “Measuring time”
- Correction
Correction: This function is set for correcting the measurement precision of the
instrument. Generally speaking, the instrument shall be corrected once every four weeks if the use environment has no obvious change.
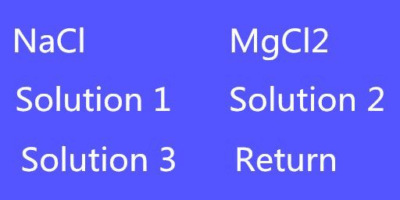
Select the correction function and press “Enter” key to enter the menu of the next page. In this page, two kinds of saturated salt for correction are indicated. After the proper saturated salt is selected, put the glassware containing prepared saturated salt solution into the water activity sensor (the glassware must not be covered with the cover glass during correction), and cover the sensor. Then press the “Enter” key, and the instrument will be in correction status and perform automatic correction for the measurement precision of the instrument. During correction, the water activity, temperature, correction time and a functional option of stopping correction will be indicated. After the correction is completed, press the “Enter” key to return to the homepage. If the correction process needs to be stopped, the “Enter” key can be pressed.
If the predicted water activity of the object needing measurement is above 0.40, then sodium chloride solution shall be used for correction; and if the predicted water activity of the object needing measurement is below 0.40, then magnesium chloride shall be used for correction.
Press “Selection” to do the correction, “correction” will be marked.
Press the “Enter” button go into the solution selection interface, as picture 6